
Beginner Baby Quilt Tutorial
My Dream Baby Quilt – SO FAST & EASY!
Beginner quilters, this one’s for you! In this tutorial, I’m going to show you how to make a fast baby quilt without ANY nesting seams! That’s right, NO MATCHING SEAMS! Get ready to quilt faster and easier than ever before!
Welcome to my SUPER EASY charm square baby quilt tutorial designed specifically for beginner quilting enthusiasts! If you’re looking for a simple quilt or a fast finish quilt, you’ve come to the right place. This quilting tutorial will guide you step-by-step through how to make a fast baby quilt. The pattern, ‘Dreams Come True’, is being offered at a great discounted price! You will enjoy creating this beautiful and charming quilt, perfect for a baby shower gift or your own little one. Let’s get started!
This easy quilt pattern is a fantastic way to start your quilting journey. It is a beginner friendly pattern with a simple layout. You don’t need any prior experience to follow along and create your first quilt. Each step is demonstrated in the video above.
Beginner Charm Square Baby Quilt
Sew Your First Baby Quilt
What if I told you there’s a way to make a beautiful charm square baby quilt that’s faster, easier, and …HERE’S THE BEST PART…it even eliminates nesting seams! That’s right, NO MATCHING SEAMS!
As a beginner, the two most important quilting techniques to learn is how to sew a 1/4-inch seam and how to match the seams of your quilt blocks. This pattern only requires that you use a 1/4-inch seam when joining your fabric squares. But don’t worry if your seams aren’t perfect, this is a very forgiving pattern!
⭐ PATTERN SALE ⭐
Dreams Come True Baby Quilt
Click Link Above to Download the Pattern
As an experienced quilter, you’ll appreciate the ease of sewing squares without aligning a single seam! You’ll be amazed how quickly this quilt goes together. And you’ll understand why I call it my Fastest Baby Quilt.
In this step-by-step quilting tutorial, you’ll learn how to create a stunning, charm square baby quilt without ANY nesting seams! So get ready to quilt faster and easier than ever before!
FAST & EASY Charm Square Baby Quilt
How to Easily Cut & Sew a Charm Square Quilt
What makes this sweet baby quilt easy is using charm packs. Using only a single size block simplifies your sewing which definitely speeds up the process. Even if you don’t have a charm pack, you can certainly use any fabric on hand that can be cut into 5-inch squares. The video below demonstrates how to quickly cut your fat quarters into charm squares. This same method may also be used to cut yardage, too.
How to Make A FAST Baby Quilt
Tips and tricks for quilting for beginners, making the process stress-free.
What makes this charm square baby quilt the fastest? It’s all about the assembly process. By using an offset piecing technique that eliminates matching seams, lots of time is saved with this quick sewing method. Using offset seams is simply adjusting the placement of you blocks so they don’t align with the adjacent rows. Without seams to match, you can sew quicker from one side to the other. Additionally, each row is pressed in the same direction which also simplifies joining the rows of blocks.

Key Steps for Simplified Quilt Assembly
There are three key steps that are important to best apply the offset block method. To simplify your quilt assembly and make the process faster and more beginner-friendly, you can utilize an offset assembly technique as demonstrated in this video. This method focuses on eliminating the need for precise seam matching.
Use Half-Size Squares:
Begin and end every other row with a half-size charm square. You must also allow 1/4-inch for the seam allowance. That means your half-square blocks should measure 2.75-inches by 5-inches. To make it easier, I simply cut a 3×5-inch piece and trim as needed when the quilt top is finished.

By setting these half-size charm squares into your rows, the beginning alignment of that row shifts over half a block. Once in place, the seam of the half-square falls in the center of the adjacent block in the previous row. Now you don’t need to align and nest those seams anymore.
Chain-Piecing:
Use this technique to keep your rows moving quickly, so you can sew straight across without worrying about complex corners. First sew two squares together, but don’t cut your threads. Instead, add the next two squares for the row below. Continue sewing pairs together until all your rows have been added.


Notice there are small spaces with a few stitches between the chain-pieced blocks. This is what holds the quilt top together as you join the rows. Once all the rows are chain-pieced it’s time to press the seams. Do not clip the rows apart!
Consistent Pressing:
When the rows are all sewn it’s time to press without cutting any threads. Press all your seams in the same direction from one side to the other. This will make joining the rows in the next step much easier.
With all your seams already pressed in one direction, you can now sew your rows together. As shown in the video tutorial, you want to sew in the same direction as the seams are pressed. This way you don’t have to worry about any of the seam allowances flipping in the wrong direction!

Once the rows are joined, it’s time for the final press. Beginning at one end of your quilt top, press all the seam allowances of the entire quilt in one direction. This makes the trimming and quilting process much smoother.
This approach not only saves time but also creates an interesting, asymmetrical visual pattern compared to a traditional checkerboard layout. Here are some other examples of offset seam quilts: Make the Easiest Rag Quilt, How to Make A Cotton & Flannel Rag Quilt.
Fabulous Scrappy Charm Square Quilt
Charm Square Baby Quilt
You’ve seen charm square quilts before, but have you seen one that looks this different? The simple offset seam trick makes this quilt a beginner’s dream and a seasoned quilter’s new best friend.
Now let me show you how to assemble a beginner-friendly quilt pattern that looks impressive but is surprisingly simple.
Time to Choose Your Fabrics
Will it be Scrappy or a Coordinated Bundle?
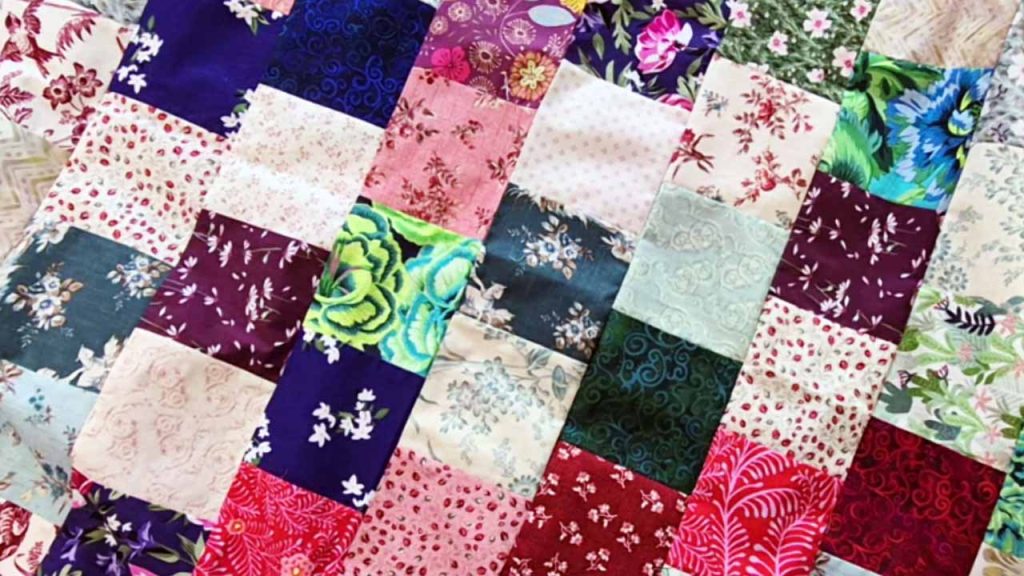
First, let’s talk about fabric! How many Charm Packs have you looked at but didn’t buy because you didn’t know what to do with them? Or how many do you have on a shelf waiting for inspiration to hit?
What about your fabric stash? You might be surprised with how many 5-inch squares you’ll find on your shelf just waiting to be cut! Don’t forget about the yardage you have tucked away, too.
Alternatively, you can can go scrappy, which is a favorite of mine! Simply pull out the fabric scraps you have and cut them into 5-inch squares. You’ll have plenty to quilt with before you know it!
As long as you have 84 charm squares measuring 5-inches, you’re ready to go! If you need to make a purchase, check out the Fat Quarter Shop online. They have a Daily Flash Sale (changes daily @ 8am) and a Precuts of the Week (changes each Monday) with generous discounts. These are affiliate links that may pay me a small percentage, though this will not affect the price you pay.

Now the Fun Begins!
Get Ready to Sew
Following the steps in the video tutorial, begin sewing your rows by chain-piecing them from the top to the bottom of your quilt. Keep in mind that this quilt may be easily enlarged simply by adding more rows. Just keep the squares coming and you’ll have a finished quilt in no time!
Lastly, you’ll press your quilt and be ready to trim, quilt, and bind it!
Happy Quilting, Lea Louise
